
I’m sure that you’ve seen plenty of scripts that set a path like “C:\temp” for logs, files, and other outputs.
But did you know that it’s actually very easy to add a pop up directory UI in PowerShell that gives a choice of where to save those output files? It’s true! And the amazing thing is that it really doesn’t take much time to write, it’s not even a lot of lines of code.
For this I’ll use any example. Let’s use a script I shared previously on how to find which process is using the most CPU with PowerShell. First, to include this function in this script I will dot-source it from my calling script.
. C:\scripts\get-iLPHighCPUProcess.ps1
This doesn’t run the command, because I’m dot-sourcing it. This is a way of making the function in that second script available in this script that I’m writing now.
Next, we can call the function from our script, and save the output to any location:
Get-iLPHighCPUProcess | Out-File C:\temp\HighCPU_Processes.txt
But this will error out if there is no C:\temp folder created. Yes, there are ways around that. You could use Test-Path to find out if the folder is there, and issue a warning if it isn’t. Or, you could force the creation of the file first by including something like this:
If (-Not (Test-Path C:\temp)) {New-Item -Itemtype directory -Path C:\temp -Force}
How to Add a “Save File As…” Dialog Window to Your PowerShell Scripts
Though both of those solutions are fine, they are NOT the point of this post! This is about how to let the users choose where to save the file in PowerShell. So let’s take a look at that.
Here I will add one extra line to the same script. The purpose is to create the dialog that shows the user a directory window where they will choose their own location where they want the file saved. Even better, this let’s the user name their saved output with whatever file name they want.
$SaveChooser = New-Object -Typename System.Windows.Forms.SaveFileDialog
$SaveChooser.ShowDialog()
Look at that! The way to have a nice UI popup where the user can choose their own place to save a file is really easy. You can use the built-in .NET Framework object for working with files, folders and Windows Forms objects to get it done!
You can see it yourself by running just those two lines from the PowerShell console. Notice that it has all of the functionality that you need. You can browse the folder structure, create or rename folders, and choose the file name to save to.
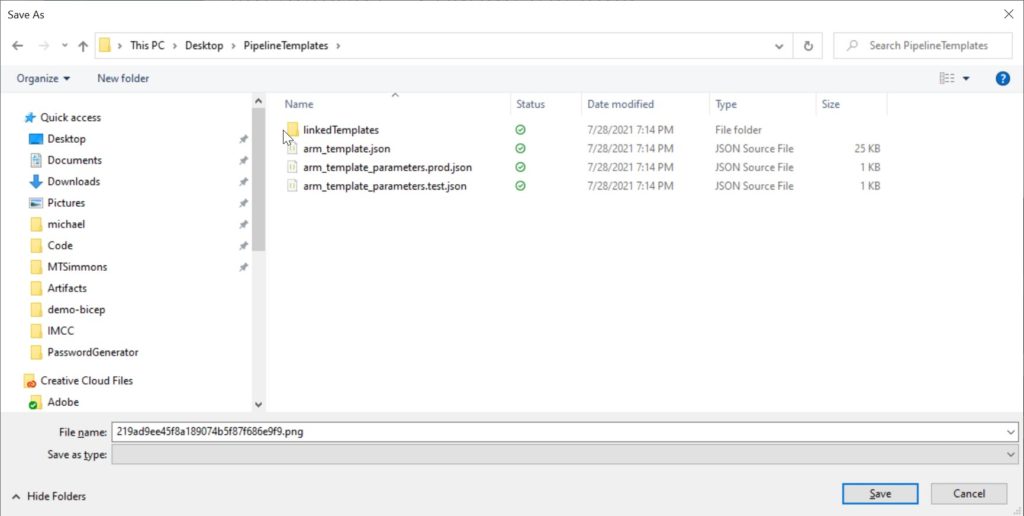
When the “Save” button is pressed, the dialog is complete. After the dialog closes, control passes back to the PowerShell script. From there, you still have the SaveDialog object saved as a variable. But now, the variable has some important information stored in its properties!
To access the file and folder path where the file should be saved you can use the FileName property.
Get-iLPHighCPUProcess | Out-File $SaveChooser.Filename
How the Save File Dialog box looks in PowerShell
Put it all together, and the code looks like this:
. C:\Users\micha\OneDrive\scripts\Get-iLPHighCPUProcess.ps1
$SaveChooser = New-Object -TypeName System.Windows.Forms.SaveFileDialog
$SaveChooser.ShowDialog()
Get-iLPHighCPUProcess | Out-File $SaveChooser.Filename
That’s a whole lot of nice functionality for such a small amount of code, it’s definitely worth it to give some choice to the script operator. So use the SaveFileDialog object from .NET to improve your PowerShell scripts.